Five Steps For Optimising Images
When it comes to uploading images onto your website, there are a few things to keep in mind other than if the pictures look good. Images can impact massively on the load time of a webpage, especially on mobile devices. By spending just a little extra time on optimising images, you can help improve user experience and even improve search engine rankings. Find out how with our top tips:
1. Check Page Speeds
Google’s Page Speed Insights is a very useful tool for measuring the performance of a webpage on both desktop and mobile devices. It’s free and easy to use – simply submit the URL of the page you want to analyse, and it quickly displays a performance score along with recommendations on how to make improvements. If it suggests optimising your images, you can click a ‘Show how to fix’ link. This lists the image files with a percentage of how much you could reduce the file size, without making a major impact on the visual quality.
2. Compress Your Images
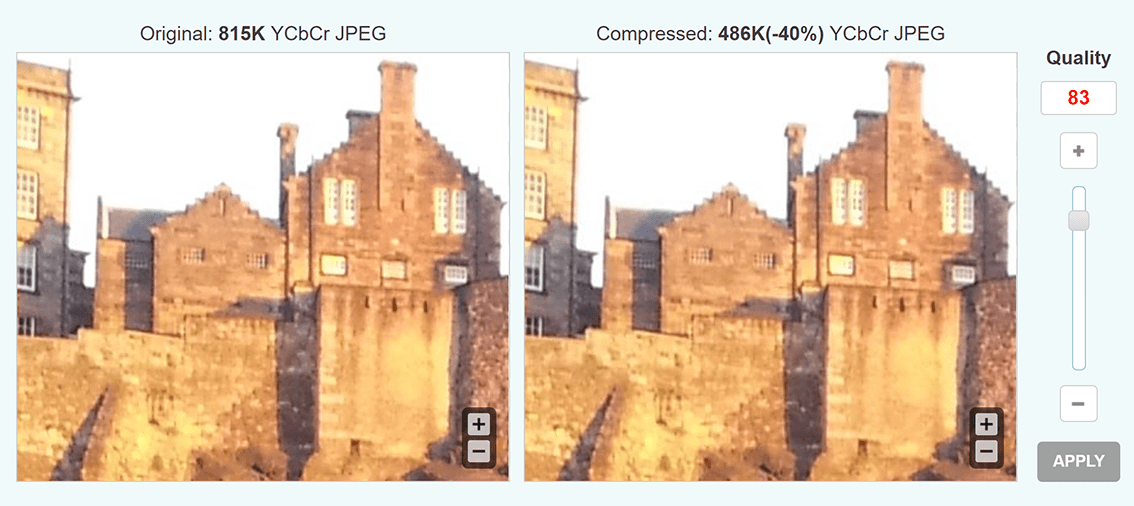
If image files are too large, this will slow down the page and overall site load time. This can have a big impact on conversions as 53% of mobile users abandon sites that take longer than 3 seconds to load (according to a survey by Soasta). Compressing your images can make a big difference to load time, and it’s a very simple process. If you use Photoshop, you can click the ‘save for web’ option which lets you choose the file size and preview the change, so you can instantly see how it affects the visual quality. There are also many online tools you can use to compress your images. One of our favourites is Optimizilla, which shrinks your image files to the smallest possible size while maintaining the required level of quality. As you can see below, you can preview a zoomed in section of your image. The image on the right shows what it looks like when it’s compressed by 88% but you can see it hasn’t made a visible difference to the quality.
3. Avoid Shrinking Dimensions Via The Source Code
You may want some images such as product shots to be large enough for visitors to see small details. There is a right and a wrong way to do this though! Don’t place a large image (over 70KB) on your page and shrink the dimensions via the source code. This only shrinks the dimensions – not the file size – so it will slow down the page load time. The best way to allow large sized images is to either allow the option to view the image in a pop-up or on a separate page.
4. Choose the appropriate file format
GIF – As this format only displays a maximum of 256 colours, you should only save an image as GIF format if it has solid blocks of colour such as logos or icons.
JPEG – This is a popular format for photographs and images with colour gradients. It supports CMYK and RGB color modes which means it can display millions of colours. For websites, you should make sure it’s saved as RGB since CMYK increases the file size and is only needed for print. The benefit of saving images a JPEG is that it retains the colour information but compresses the file size by selectively eliminating data. If a low to moderate amount of compression is applied, the loss of this data won’t make a noticeable difference to the image.
PNG – This can also be used for photographs as it supports millions of colours too. The main difference is that it involves lossless compression, which means it doesn’t discard any data. Although this preserves the quality of the image, it makes PNG is a larger file size than JPEG or GIF. If you’re going to save as PNG, make sure the image’s dimensions aren’t very big.
5. Include Alt Tags
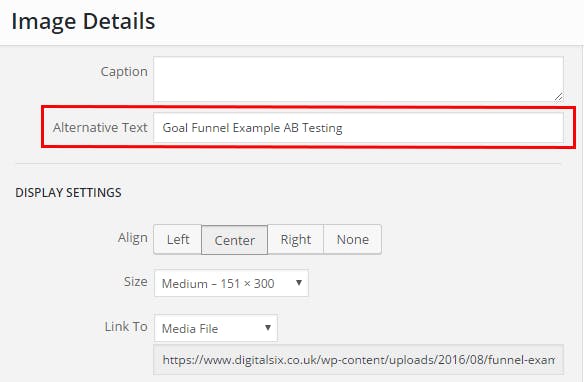
A quick and easy way to help improve your search engine rankings is to include alt tags. These should describe exactly what can be seen in the image, with relevant keywords. Without doing this, a search engine can’t detect what’s featured in your image and therefore won’t help with SEO. Alt tags are also very useful for the visually impaired who may use a screen reader. This device will read out what is written in the alt text, which helps improve user experience.
